The stupid simple Portainer Server + Agent Setup

Are you like me and just want the content for your docker-compose.yml file, of a service you might want to try, without much blah blah about settings, background information, and setup?
Then you're at the right place. Just head over to your desired location, open your compose file, and insert:
Portainer Server
services:
  portainer:
    container_name: portainer
    image: portainer/portainer-ce:latest
    restart: unless-stopped
    ports:
      - 9000:9000
    volumes:
      - /var/run/docker.sock:/var/run/docker.sock
      - /etc/localtime:/etc/localtime:ro
      - ./data:/data
Of course, if you prefer Docker volumes, you could also replace the data mount with a volume, like this:
       - portainer_data:/data

volumes:
  portainer_data:
And thats it! Now just run docker compose up -d and access your Portainer Server instance at MACHINE_IP:9000
Portainer Agent
The setup for an agent is incredibly similar, just go to your machine that you want to monitor, create a new docker-compose.yml and insert:
services:
  portainer_agent:
    image: portainer/agent:latest
    container_name: portainer_agent
    ports:
      - 9001:9001
    volumes:
      - /var/run/docker.sock:/var/run/docker.sock
      - /var/lib/docker/volumes:/var/lib/docker/volumes
      - /:/host
    restart: unless-stopped
After that just run docker compose up -d again and your agent should be online.
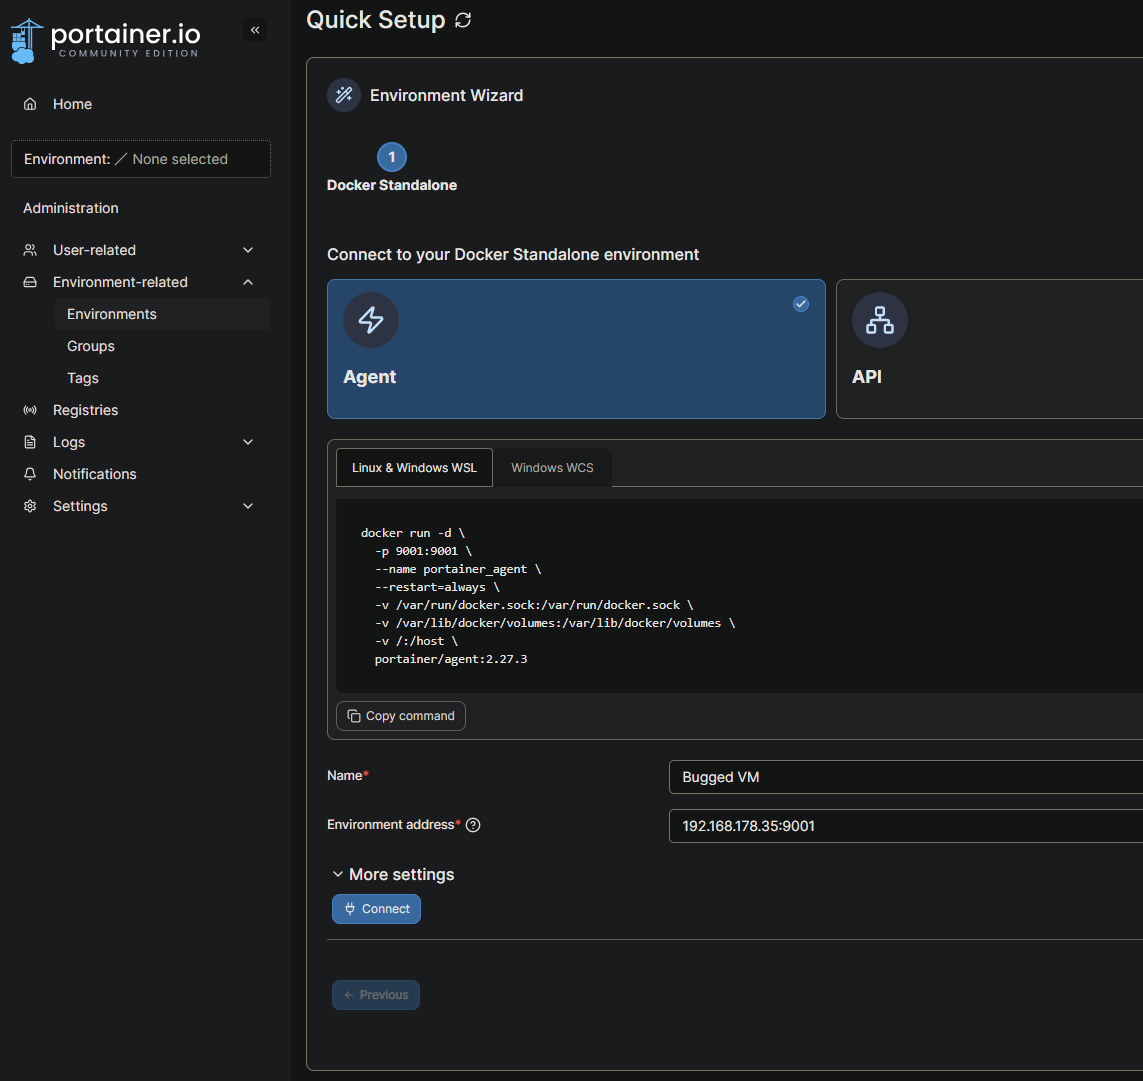
Now just head back over to your Server instance, select Environment-related from the left menu, then Environments and here Add environment.
Now select Docker Standalone and click Start Wizard. Here you can now enter a name for the new environment / machine and insert the address. In this case it would be AGENT_IP:9001. Then hit Connect and that should be it! Now you should be able to see your agent’s environment alongside your local ones.