How to Reflash Your Lenovo NAS Firmware

If you own a Lenovo NAS, such as a model from LenovoEMC² or Iomega, you might need to reflash the firmware at some point. Whether you're recovering from an issue or just updating, reflashing can be a straightforward process when you have the right tools. Here's a guide to help you get your NAS back up and running.
A Little Background
I purchased a LenovoEMC² PX4-400R NAS off eBay, but I accidentally bricked it during a reset. After doing some research and finding useful information online, I was able to recover my device. Now, I’m sharing this guide to help anyone who might be in the same situation.
Step 1: Download the Lenovo LifeLine Imager
The Lenovo LifeLine Imager is a tool used to create a bootable USB drive for reflashing the firmware. To download it, follow these steps:
How to Construct the Download Link
- Go to Lenovo’s Support Page:
Head to the LenovoEMC Network Storage Support page. - Find Your Device:
Look for your specific NAS model (e.g., PX4-400R, IX2) and open the support page for it. - Download the Firmware:
Under the “Downloads and Updates” section, find the firmware version for your NAS device. - Find the Update Instructions:
Scroll down to the “Firmware Update Procedure” section. The first step usually tells you to download a.tgzfile, such asb4b-4.1.414.34909.tgz. - Construct the Download Link:
Take the filename (without the.tgzextension), and construct the following URL:https://download.lenovo.com/nasupdate/asgimage/{filename}.zip
For example:
If the file isb4b-4.1.414.34909.tgz, the download link will be:https://download.lenovo.com/nasupdate/asgimage/b4b-4.1.414.34909.zip - Download the Imager Tool:
Open the constructed link in your browser, and you'll be able to download the Lenovo LifeLine Imager tool.
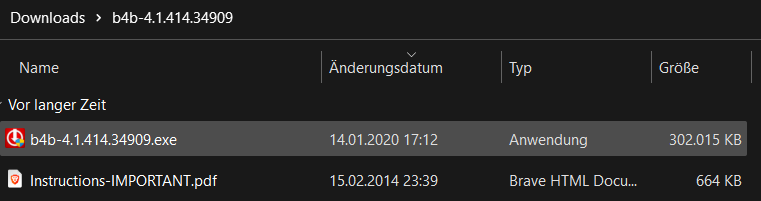
Once downloaded, extract the .zip file, and you should see the files inside.
Step 2: Flash the Firmware
Important: Backup Your Data!
Flashing the firmware will wipe your data. Please remove your hard drives before starting.
Now, let’s get started with flashing the firmware:
- Format the USB Drive:
Format a USB drive to FAT32. It should be at least 1GB and no larger than 32GB. - Unzip and Run the Imager Tool:
Unzip the downloaded LifeLine Imager and run the executable file. - Select the USB Drive:
Choose the formatted USB drive as the destination for the imager. - Complete the Setup:
Finish the setup process in the tool. - Eject the USB:
Once the tool is finished, safely eject the USB drive. - Insert the USB into the NAS:
Plug the USB into the top-left port on the back of the NAS. - Boot the NAS:
While holding the reset button for about 60 seconds, power on the NAS. Wait until the firmware flashing screen appears.
The screen should look like this:
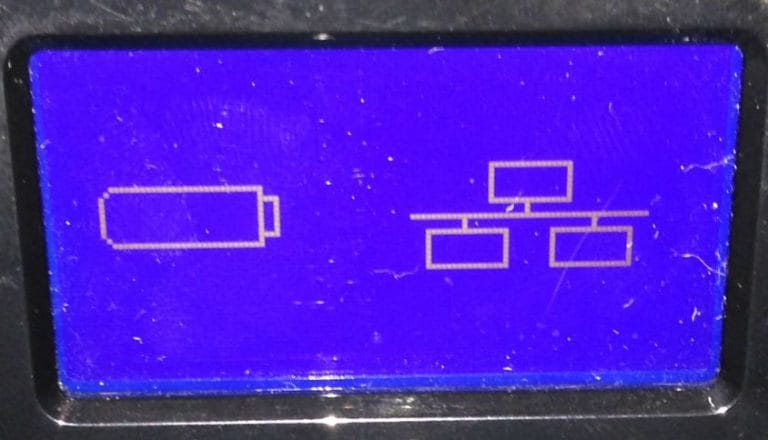
- Wait for the Process to Finish:
Once the flashing is complete, the NAS should shut down automatically. - Remove the USB:
Take out the USB drive. - Turn On the NAS:
Power on the NAS again. The firmware should now be installed and your NAS should be ready for reconfiguration.
Step 3: Troubleshooting
- USB Formatting: Make sure the USB drive is formatted as FAT32. Other formats may not be recognized by the NAS.
- Using Rufus: If the LifeLine Imager tool doesn’t recognize your USB drive, try using Rufus to format it to FAT32 with MBR partition scheme.
USB File Structure
After flashing the firmware, your USB should look like this:
USB-DRIVE:.
├───boot
│   └───grub
│       ├───locale
|       └───...
├───images
│   └───...
└───emctools
    └───b4b_images
        └───VERSION_Imager.tgz
The VERSION_Imager.tgz file is the firmware file that will be flashed to your NAS.
Known Lenovo LifeLine Imager Downloads
Here are some known download links for various Lenovo devices. These links will allow you to download the firmware and LifeLine Imager tool for specific models.
LenovoEMC
| Device | Firmware Version | Download Link | Notes | Type |
|---|---|---|---|---|
| PX4-400R | 4.1.414.34909 | Download | Same for PX4-400D | Rack |
| PX4-300R | 4.1.414.34909 | Download | Rack | |
| PX12-400R | 4.1.414.34909 | Download | Same for PX12-450R | Rack |
| PX4-300D | 4.1.414.34909 | Download | Same for PX6-300D | Desktop |
| PX2-300D | 4.1.414.34909 | Download | Desktop |
Lenovo
| Device | Firmware Version | Download Link | Notes | Type |
|---|---|---|---|---|
| IX4-300D | 4.1.414.34909 | Download | Desktop | |
| IX2 | 4.1.408.34845 | Download | Same for IX2-DL | Desktop |
Iomega (StorCenter)
| Device | Firmware Version | Download Link | Notes | Type |
|---|---|---|---|---|
| ALL | 4.1.414.34909 | Same as LenovoEMC | Both |
If any of these links are broken or if you have a different device, let me know. You can also find the Lenovo LifeLine Imager tool in the Releases section or on my storage server.